Dropping the cylinder head back on is straightforward. I just wanted to visually confirm that the timing marks on the signal generator were placing cylinders 1 and 4 at Top Dead Center before torquing down the head and installing the camshafts. With the timing mark aligned at T 1-4, everything was looking good.


Place the head gasket and cylinder head over the studs and then torque the head bolt in the pattern cast right into the cylinder head.

When I previously removed the valve shims and valve buckets, I placed them into an egg carton so that it was easy to keep track of which cylinder and which valve they came from. I am hoping that most of my valve adjustments after this will be limited to the number 3 intake valve since that was the only valve that needed to be replaced.

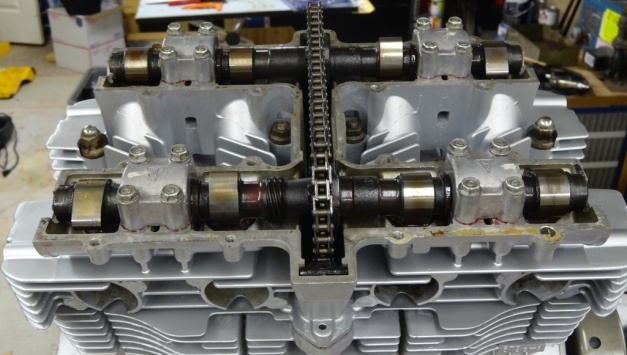
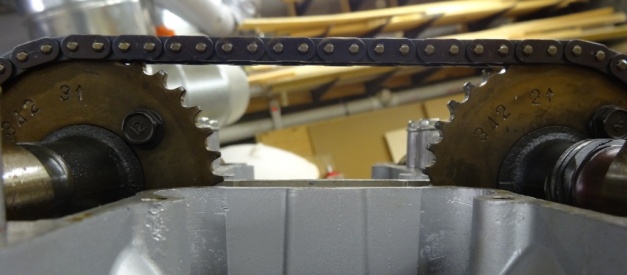
Now it is time to install the intake and exhaust cams and set the timing of the valves. The exhaust cam has 1 and 2 stamped on the sprocket as well as the threaded section for the tachometer reading. The number 1 and arrow on the exhaust sprocket are to be pointing forward and parallel with the surface of the cylinder head.

Once you have the exhaust cam aligned, the intake cam is installed so that there are 20 chain pins between the number 2 mark on the exhaust cam sprocket and the number 3 mark on the intake cam sprocket. A common mistake in this step is not starting the count of the pins at 1 and then ending up with an extra pin between the sprockets.
Once everything was tightened down I rotated the crank a number of times by hand to make sure that the number 1 mark on the exhaust cam sprocket and Top Down Center on the camshaft were coming back around to proper alignment and no sense of interference with the valves and pistons.
The next thing that I want to do now is to rebuild the cam chain tensioner. This is one item that I did not take a look at the first time around and suspect that it is a large reason why the rear cam chain guide broke at the point where it interfaces with the tensioner.